Budget flood protection works best when it is aimed at one specific weak point: the garage door, a low patio slider, a driveway that slopes toward the house, a basement window well, a side-yard flow path, or a front door that takes street water. The goal is not to turn cheap supplies into a fortress. The goal is to stop the first few inches of water from becoming a room full of damage.
The cheap barrier rule
Cheap barriers make the biggest impact when water is shallow, slow, predictable, and coming from a known direction. They are much weaker when water is deep, fast-moving, contaminated, pressing against walls for hours, or entering through drains, cracks, weep holes, or utility penetrations.
Low-cost flood protection should be treated as a delay and diversion system. It can redirect driveway flow, block nuisance seepage, slow water at a garage door, protect a basement window well, or buy time for a pump to keep up. It should be paired with drainage maintenance, raised storage, leak sensors, insurance review, and a safe plan for cleanup if water still gets in.
Find the water path, clear drainage, raise storage, seal small gaps, stage temporary barriers, add sensors, then review flood insurance.
9 low-cost flood barriers with real impact
The cheapest option depends on the water source. These are budget-friendly tools that can make a meaningful difference when matched to the right problem.
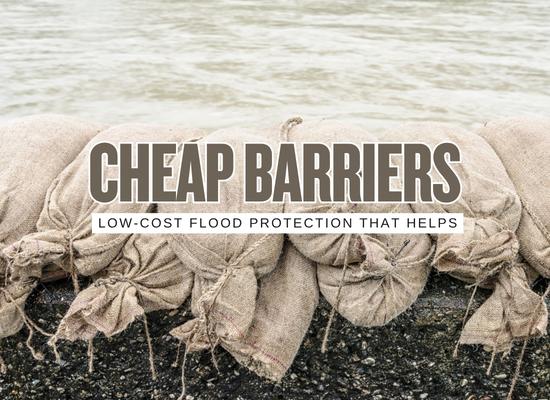
①Traditional sandbags
Sandbags remain useful because they are flexible, familiar, and easy to shape around doors, garage edges, drains, and side-yard flow paths. Their biggest drawback is labor: filled bags are heavy, messy, and slow to deploy. They work best as short-term protection against shallow water, not as a permanent solution.
②Sandless flood bags
Sandless bags and water-activated barriers are easier to store and move than traditional sandbags. Many expand when wet and can be placed across doorways, garage doors, patios, or basement entries. They are especially useful for homeowners who cannot lift dozens of sandbags.
③Plastic sheeting behind a sandbag line
Plastic sheeting can improve a temporary barrier when used correctly with sandbags because it helps reduce seepage through the bag wall. The sheeting should be secured and weighted so water pressure does not simply move it out of position.
④Garage bottom seal replacement
A worn garage bottom seal can let ordinary rain, driveway runoff, leaves, and shallow water sneak under the door. Replacing the seal is not the same as installing a true flood shield, but it is one of the cheapest ways to reduce nuisance garage seepage.
⑤Garage threshold strip
A raised threshold strip can help when water slips under the garage door during light rain or shallow driveway flow. It should be used carefully because it can also trap water inside if the garage has another entry point or if water already gets behind the strip.
⑥Door sweeps and weatherstripping
Door sweeps, fresh weatherstripping, and small exterior caulk repairs can reduce wind-driven rain and minor water entry around side doors, sheds, utility doors, and patio entries. These are not flood doors, but they can reduce small leaks that become repeated damage.
⑦Window well covers and raised well edges
Basement window wells can fill quickly when downspouts, grading, or heavy rain send water toward the foundation. Clear covers, cleaned drains, and a slightly higher well edge can reduce water collecting against basement windows.
⑧Downspout extensions and splash blocks
Roof water is one of the largest water sources a homeowner can redirect cheaply. Extensions and splash blocks move water away from doors, garage slabs, basement walls, and low corners. This is not a barrier in the classic sense, but it often prevents the water problem from reaching the barrier.
⑨Water alarms near the first failure points
A water alarm does not block water, but it can be one of the cheapest tools that changes the outcome. Place sensors near the garage slab, sump pit, water heater, basement door, patio slider, laundry area, and low storage zones. Earlier notice can mean less spread, faster cleanup, and better documentation.
Budget barrier comparison
Cheap barriers are strongest when the homeowner understands the tradeoff between price, labor, speed, and repeat use.
| Budget option | Best target | Impact level | Weak point | Best pairing |
|---|---|---|---|---|
| Sandbags | Shallow water, odd corners, side gaps, emergency redirection | High when placed early and correctly | Heavy, messy, disposal issues, imperfect seal | Plastic sheeting, gloves, shovel, raised storage |
| Sandless bags | Doorways, garage doors, patios, light driveway flow | High for fast setup and storage convenience | Performance varies, some do poorly with salt water, limited height | Side-gap sandbags and water alarms |
| Plastic sheeting | Seepage reduction behind a temporary wall | Moderate when weighted properly | Fails if not secured or if water gets around it | Sandbags, tape, boards, and clear setup plan |
| Garage seal | Minor garage seepage and worn door gaps | Moderate for nuisance water | Not a true flood barrier | Threshold strip and driveway drainage check |
| Threshold strip | Light water under garage or utility doors | Moderate for shallow seepage | Can trap water inside if misused | Bottom seal and drain cleaning |
| Door sweep | Wind-driven rain and small side-door gaps | Low to moderate | Cannot resist real flood pressure | Weatherstripping and small exterior grading fixes |
| Window well cover | Basement window splash and rain collection | Moderate when paired with drainage | Will not solve a clogged well drain or bad grading alone | Downspout extension and cleaned well drain |
| Downspout extension | Roof water near foundation, doors, or basement walls | Very high for the cost | Can create problems if water is sent to neighbors or walkways | Splash block, grading, gutter cleaning |
| Water alarm | Early warning at first failure points | High for response time | Does not stop water by itself | Any barrier, pump, or raised-storage plan |
Cheap flood barrier impact estimator
Use this tool to compare a small barrier budget with the cost of shallow water entering a garage, basement, utility room, or low doorway. It is a planning tool, not a floodproofing guarantee.
Score logic: likely water depth, warning time, setup labor, and uncertainty around the weak point are combined into a planning score. The value signal compares estimated damage exposure with the selected budget.
Starter kits by budget level
These are practical combinations, not brand recommendations. The exact products should match the home’s openings, water path, and local flood conditions.
| Budget level | Best use | Starter stack | Impact note |
|---|---|---|---|
| Very low | Homeowners who need basic protection this week | Downspout extensions, gutter cleaning, raised storage, one water alarm | Often the best return because it prevents water from reaching the opening |
| Low | Garage or low-door nuisance water | New garage seal, threshold strip, sandless bags or a small sandbag kit, water alarm | Good for shallow water and repeated small leaks |
| Moderate | Known driveway flow or patio door risk | Sandless barriers, plastic sheeting, side-gap sandbags, storage shelves, extra sensors | Better for homeowners who can stage supplies before a storm |
| Targeted upgrade | Basement window or stairwell risk | Window well covers, cleaned drains, raised edges, downspout correction, sensor at low point | Useful when roof water or grading sends water into a well |
| Repeat-event prep | Homes that flood several times a year | Reusable barrier, better drainage, multiple sensors, raised storage, flood insurance review | Cheap supplies may still help, but repeated flooding deserves a bigger plan |
Low-cost barriers by water path
Buying the right cheap barrier starts with naming the water path. The same product can be useful in one situation and nearly useless in another.
| Water path | Cheap option that helps | Extra step that multiplies impact | Bad match |
|---|---|---|---|
| Driveway slopes toward garage | Sandless barrier, sandbags at side gaps, garage seal | Observe flow during rain and add a drainage correction when possible | Door sweep alone |
| Water sneaks under garage door | Bottom seal and threshold strip | Add sensor and raise storage off the slab | High sandbag wall for a tiny seal gap |
| Roof water dumps near foundation | Downspout extension and splash block | Clean gutters and fix grade near wall | Door barrier far from the actual water source |
| Basement window well fills | Window well cover and cleaned drain | Redirect downspout and raise well edge where appropriate | Only placing bags at the basement door |
| Street water reaches front walk | Sandbags or sandless bags at low entry | Document depth and consider a more durable shield if repeated | Interior towels as the main plan |
| Water appears first near water heater or laundry | Water alarm and raised storage | Check plumbing, drains, sump, and appliance hoses | Exterior barrier if the source is indoors |
Set up mistakes that waste money
Cheap flood barriers fail most often because they are bought but not staged, placed in the wrong direction, or asked to do the job of a professional flood system.
- ① Buying before watching water: A homeowner should know whether water comes from the roof, street, driveway, side yard, drain, ditch, or basement well.
- ② Ignoring the sides: Water often enters around the ends of a garage door or barrier, not through the center.
- ③ Blocking water with no outlet: A barrier can make water pool higher if the water has nowhere safe to go.
- ④ Using door seals as flood shields: Seals help nuisance water but are not a substitute for true flood protection.
- ⑤ Storing supplies behind clutter: A barrier that cannot be reached quickly during a storm is not useful.
- ⑥ Forgetting contamination: Floodwater can contaminate bags, rugs, boxes, and storage items, so disposal and cleanup should be part of the plan.
- ⑦ Skipping insurance: Cheap barriers can reduce risk, but they do not replace flood insurance for a serious event.
The 60-minute cheap protection drill
A homeowner can make meaningful progress without a contractor. This quick drill helps find the best low-cost upgrades before the forecast gets stressful.
- ① Walk the outside wall: Look for low doors, garage gaps, short downspouts, high mulch, blocked drains, and ponding marks.
- ② Pick one first-fail opening: Choose the garage door, patio slider, basement well, utility door, or front entry most likely to see water first.
- ③ Measure the opening: Record width, side gaps, threshold height, and nearby slope.
- ④ Build a small barrier kit: Keep sandless bags or sandbags, plastic sheeting, gloves, tape, a flashlight, and instructions together.
- ⑤ Raise the first-loss items: Move cardboard boxes, tools, documents, electronics, chemicals, and rugs off the floor.
- ⑥ Place one water alarm: Put the alarm where water would first touch the floor.
- ⑦ Photograph the setup: Save pictures of the opening, supplies, storage, and any drainage work for insurance and future planning.
- ⑧ Practice once: Time how long it takes to place the barrier in dry weather.
The practical budget takeaway
Cheap flood barriers can make a real difference when they are targeted, staged, and paired with basic drainage work. The strongest low-cost plan is rarely a single product. It is a small stack: redirect roof water, clear drains, raise storage, seal nuisance gaps, stage sandbags or sandless barriers at the first-fail opening, add water alarms, and keep flood insurance current. The more predictable the water path, the more useful a low-cost barrier becomes.