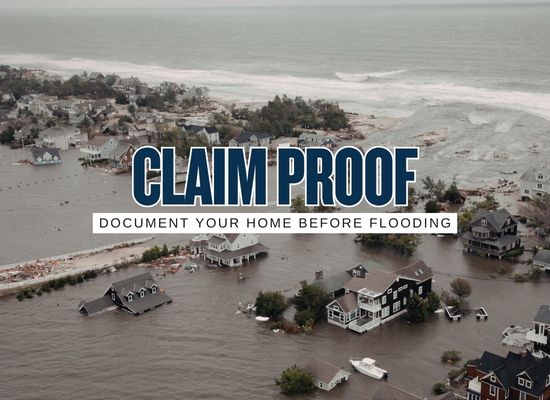
A flood claim is much easier to defend when the proof already exists before the water enters the house. Photos after a flood matter, but pre-flood documentation can show condition, ownership, value, serial numbers, room layout, appliances, flooring, cabinets, improvements, and contents that may be impossible to identify later. The strongest home file is not complicated. It is a clean set of photos, videos, receipts, policy records, room inventories, and cloud backups that can help the homeowner move faster when stress, cleanup, adjuster visits, and repair decisions arrive at the same time.
A flood claim is not only about proving that water entered the home. It is about proving the home’s condition, contents, value, layout, improvements, appliances, finishes, serial numbers, receipts, and repair history before the damage blurred everything together. The best claim documentation starts before the storm, before the cleanup crew, and before the adjuster appointment.
The claim file should exist before the claim
Flood recovery is chaotic. Floors may be wet, power may be off, furniture may be moved, drywall may be cut, and damaged items may be piled outside. That is a terrible time to remember the model number of an appliance, the age of flooring, the contents of a closet, or the cost of a recent renovation.
A strong pre-flood file has three layers. The first layer proves the building condition: rooms, floors, cabinets, appliances, mechanical systems, exterior walls, roof drainage, foundation areas, and utility equipment. The second layer proves personal property: furniture, electronics, tools, clothing, collections, appliances, decor, and storage items. The third layer proves value: receipts, invoices, photos of labels, serial numbers, appraisals, warranties, renovation contracts, and policy documents.
The 30-minute proof sweep
Homeowners often delay documentation because it sounds like a weekend project. A useful starter file can be built in 30 minutes with a phone, decent lighting, and a simple route through the home.
1Start at the front door
Record a slow video entering the home. Say the date, address, and room name out loud. Pan slowly from ceiling to floor and from corner to corner. Open closets, cabinets, and storage areas briefly so the video shows contents without needing a perfect item list.
2Capture every room in the same order
Use a consistent route: entry, living area, kitchen, bedrooms, bathrooms, laundry, garage, attic access, closets, sheds, and exterior. Consistency helps later when comparing before-and-after photos.
3Stop for big-ticket items
Take separate photos of appliances, electronics, furniture, tools, HVAC equipment, water heaters, generators, computers, televisions, exercise equipment, musical instruments, collectibles, and valuable contents.
4Zoom in on labels and serial numbers
Appliances and electronics often have model and serial plates. Photograph those labels while the item is dry, visible, and easy to access. This can be very difficult after a flood.
5Save the file outside the house
Upload the photos, videos, inventory spreadsheet, receipts, and policy documents to cloud storage or another secure off-site location. A phone or laptop left inside a flooded home is not a backup.
Room-by-room documentation map
Flood claims often become difficult when valuable items were stored low, hidden in closets, or placed in garages and sheds. A room map keeps the file balanced so the homeowner does not document the living room beautifully and forget the places where flood loss is most likely.
| Area | Photos and videos to capture | Labels, receipts, and proof to save | Common blind spot |
|---|---|---|---|
| Kitchen | Appliances, cabinets, countertops, flooring, pantry, under-sink area, breakfast area | Appliance model and serial numbers, cabinet invoices, flooring receipts, renovation records | Food storage, small appliances, cookware sets, and water damage inside base cabinets |
| Living areas | Furniture, rugs, electronics, built-ins, flooring, wall finishes, decor, windows | TV serial numbers, furniture receipts, rug appraisals, sound system records | Power strips, gaming systems, speakers, and low storage furniture |
| Bedrooms | Beds, dressers, clothing storage, closets, electronics, flooring, attached bathrooms | Mattress receipts, furniture records, jewelry appraisals, electronics serial numbers | Closet floors, shoes, handbags, luggage, and storage bins |
| Bathrooms | Vanities, tubs, showers, toilets, flooring, cabinets, plumbing fixtures | Remodel invoices, fixture receipts, tile and flooring records | Water trapped behind vanity bases or under cabinets |
| Laundry | Washer, dryer, cabinets, utility sink, flooring, nearby storage | Appliance serial numbers, warranty records, repair invoices | Detergents, stored linens, cleaning equipment, and low electrical outlets |
| Garage | Tools, freezers, storage racks, bikes, lawn equipment, water heater, electrical panel | Tool receipts, freezer model number, generator records, equipment serial numbers | Boxes, holiday items, tools, paint, sports gear, and items stored directly on slab |
| Exterior | HVAC unit, generator, fences, shed, drainage, foundation vents, doors, windows, decks | HVAC records, generator receipts, fence contracts, shed invoices, elevation certificate if available | Low equipment pads, detached structures, and exterior storage |
| Documents | Policy pages, mortgage records, receipts, appraisals, warranties, permits, contractor invoices | Cloud copies, external drive, safe storage, shared family access | Paper records stored in bottom drawers, closets, or file boxes on the floor |
The proof file stack
A good claim file is easy to understand because each document has a job. Homeowners should avoid dumping hundreds of random photos into one folder with no labels. The cleaner structure below makes it easier to find proof during the claim.
Baseline video folder
Store slow walkthrough videos by date. File names can be simple: living-room-before, kitchen-before, garage-before, exterior-before. The goal is easy retrieval, not fancy labeling.
Room photo folders
Keep room photos separate from receipt images. This makes it easier to compare pre-flood condition with damage photos and helps avoid lost details during stressful cleanup.
Serial number folder
Save close-up photos of appliance and electronics labels. Include HVAC, water heater, washer, dryer, refrigerator, freezer, computers, televisions, generators, and major tools.
Receipts and value folder
Save purchase receipts, credit card statements, contractor invoices, remodel records, appraisals, warranties, and screenshots of replacement prices for major items.
Insurance and property folder
Keep the declarations page, flood policy, homeowners policy, mortgage information, elevation certificate if available, survey, permits, and agent contact information together.
Claim conversation log
Create a running log for calls, emails, adjuster appointments, contractor visits, receipts, temporary repairs, and cleanup decisions. A clean timeline reduces confusion later.
Flood claim documentation scorecard
This scorecard helps homeowners see whether their proof file is ready or thin. It is not an insurance decision tool. It is a practical readiness check before storm season, hurricane season, or a known flood threat.
Scorecard logic: room video coverage, serial number coverage, receipt strength, policy records, backup method, and update timing are combined into a 100-point readiness estimate. The score is for household planning only and does not guarantee claim payment.
Building coverage and contents coverage need separate proof
Flood documentation gets messy when homeowners mix building damage and personal property damage together. A simple way to stay organized is to separate the two from the start.
| Proof category | Examples | Best documentation | Easy mistake |
|---|---|---|---|
| Building | Walls, floors, cabinets, electrical, plumbing, built-in appliances, HVAC, water heater, foundation elements | Room videos, close-up finish photos, contractor invoices, appliance labels, repair records, permits | Failing to show pre-flood condition of cabinets, flooring, and mechanical systems |
| Contents | Furniture, clothing, electronics, rugs, tools, small appliances, decor, books, household goods | Inventory list, room photos, receipts, serial numbers, replacement-cost screenshots, appraisals | Discarding damaged items before photographing and listing them |
| Temporary repairs | Drying, tarps, cleanup supplies, emergency electrical work, disposal, dehumidifiers | Receipts, vendor invoices, photos before and after, date-stamped notes | Paying cash without a receipt or losing the paperwork |
| Conversations | Calls with insurer, adjuster, contractor, mortgage company, landlord if renting | Date, name, phone number, summary, next step, email confirmation when possible | Relying on memory during a stressful recovery period |
Claim-day photo sequence after water enters
Pre-flood documentation is the baseline. After water enters, the homeowner needs a second set of proof that shows the event, the waterline, the damaged areas, the damaged contents, and the cleanup costs. Safety comes first. Do not enter unsafe water, a damaged structure, or an area with electrical hazards.
Photograph each room from the doorway, then each wall, then close-ups of waterlines, damaged materials, furniture, appliances, cabinets, flooring, and contents in place.
Photograph piles by room, damaged item groups, cut flooring or drywall, wet insulation, cabinet removal, appliance damage, and contractor work.
Photograph drying equipment, removed materials, saved samples, repair receipts, replacement items, and any areas awaiting adjuster review.
Home inventory fields that make a claim easier
The inventory does not need to be beautiful. It needs to be usable. A spreadsheet, note app, home inventory app, or simple document can work as long as the information is clear and backed up.
| Field | Example entry | Reason it helps |
|---|---|---|
| Room | Kitchen | Connects item to photos and damage location |
| Item name | French door refrigerator | Creates a clear itemized list |
| Brand, model, serial | Brand, model number, serial plate photo | Supports identification and replacement research |
| Purchase date or age | Purchased 2023 or approximately 3 years old | Helps estimate value and condition |
| Estimated value | $1,800 | Creates a starting point for claim discussion |
| Proof file | Receipt photo, warranty PDF, credit card statement | Links the item to supporting evidence |
| Flood impact | Water reached bottom motor area, photos taken | Connects pre-flood ownership to post-flood damage |
Receipt recovery when paperwork is missing
Most households do not have every receipt. That does not mean the file is useless. Homeowners can often rebuild value proof from several sources.
- ① Email search: Search inboxes for order confirmations, delivery notices, warranties, contractor invoices, and store receipts.
- ② Retailer accounts: Check order history at home improvement stores, appliance stores, furniture stores, electronics retailers, and online marketplaces.
- ③ Credit card records: Save statements showing purchase dates, vendors, and amounts for major items.
- ④ Contractor files: Ask remodelers, HVAC companies, plumbers, electricians, flooring installers, and cabinet shops for duplicate invoices.
- ⑤ Warranty registrations: Appliance and electronics warranty portals may show purchase details, model numbers, and serial numbers.
- ⑥ Photos from daily life: Family photos may show furniture, electronics, flooring, appliances, and room condition before the flood.
- ⑦ Replacement screenshots: Save current replacement prices for comparable products, especially when original receipts are unavailable.
Storage rules for a file that survives the flood
Documentation has to remain available after the disaster. A file stored only in a home office, phone, or laptop can disappear at the same time the loss happens.
Cloud copy
Store photos, videos, policies, receipts, and inventory files in a cloud account that can be reached from a different device.
Shared access
Give a spouse, trusted family member, or household decision-maker access to the folder in case one person’s phone, password, or email is unavailable.
Portable record
Keep a simple printed page with insurer, policy number, agent, mortgage company, emergency contacts, and the cloud folder location.
Annual refresh
Update the file after renovations, appliance purchases, furniture changes, new electronics, major repairs, or storm-season preparation.
Common proof gaps that slow recovery
The most painful claim delays often come from missing details that seemed minor before the flood. The list below is a quick audit for weak spots.
- ① No pre-flood room videos: After damage, it can be hard to show prior condition, layout, and contents.
- ② No serial numbers: Appliances and electronics can be difficult to identify after water damage or disposal.
- ③ Receipts stored in low drawers: Paper proof can be destroyed by the same water that damages the property.
- ④ Contents mixed with building damage: Separate folders reduce confusion when policy categories, limits, and deductibles differ.
- ⑤ Cleanup started without photos: Emergency cleanup may be necessary, but documentation should happen as early and safely as possible.
- ⑥ Damaged materials thrown away too quickly: Photos, item lists, and small samples can help preserve evidence when cleanup cannot wait.
- ⑦ No conversation log: Claim details can become hard to track when multiple adjusters, contractors, and calls are involved.
- ⑧ No backup outside the home: A perfect file on a flooded laptop is not a useful file.
The practical homeowner takeaway
Flood claim documentation is strongest when it begins before the water. A slow walkthrough video, room photos, serial number close-ups, receipts, policy records, cloud backups, and a simple conversation log can turn a stressful claim into a more organized recovery. The file does not need to be perfect. It needs to be clear, current, backed up, and built before the damage makes proof harder to gather.