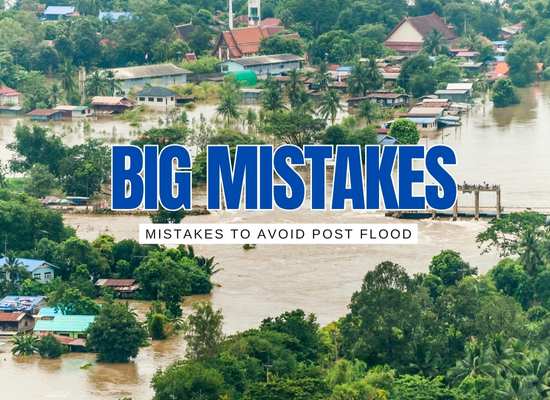
After a flood, speed matters, but so does doing it right. Rushing in without a plan can spread contamination, make you sick, or ruin things that could’ve been saved. Start here, avoid these 10 big mistakes, and you’ll clean faster, safer, and with fewer regrets.
❌ Mistake #1: Entering Without Proper PPE
Flood water isn’t “just water”—it can carry sewage, fuel residue, mold spores, and sharp debris. One misstep without protection can turn into a trip to urgent care.
| Do This Instead |
The Safer Outcome |
| Wear boots, nitrile gloves, long sleeves, eye protection, and an N95 or respirator. |
Cuts, rashes, and breathing issues are far less likely. |
| Turn off power to wet areas before entry. |
Eliminates electrocution risk near submerged outlets or cords. |
| Keep a “clean zone” for food, water, and handwashing. |
Prevents cross-contamination while you work. |
Tip: Double-glove so you can strip off the outer layer when it gets contaminated.
❌ Mistake #2: Waiting Too Long to Dry
Mold growth can start in less than two days. Delaying the drying process means bigger demolition, higher repair costs, and possible health issues later.
| Do This Instead |
How It Pays Off |
| Remove standing water, soaked carpets, and wet drywall promptly. |
Prevents mold colonies and hidden moisture problems. |
| Run dehumidifiers and high-CFM fans continuously. |
Speeds up drying so structure can be repaired sooner. |
| Ventilate safely, avoiding airflow into clean rooms. |
Keeps spores from spreading to unaffected areas. |
Tip: Use a moisture meter—don’t seal walls until readings are within safe limits.
❌ Mistake #3: Using Bleach on Porous Materials
Bleach may kill surface mold, but it can’t penetrate porous items like drywall or wood. You end up masking the problem—not fixing it—and mold can return stronger.
| Do This Instead |
Better Long-Term Result |
| Remove and discard porous materials that got wet. |
Ensures no hidden mold colonies remain inside. |
| Use EPA-approved fungicides for structural surfaces. |
Treats deeper into the material than bleach can. |
| Dry fully before applying any coatings or sealers. |
Locks in protection and prevents mold rebound. |
Tip: If in doubt—tear it out. It’s cheaper than a mold remediation later.
❌ Mistake #4: Throwing Away Receipts and Serial Numbers
Tossing ruined items without documentation is like handing the insurance company a reason to pay you less. Missing proof can delay claims or reduce payouts.
| Do This Instead |
Claim-Friendly Result |
| Photograph each damaged item before disposal. |
Creates visual proof for adjusters. |
| Record serial numbers and model info if visible. |
Strengthens your claim with verifiable data. |
| Keep receipts or credit card statements as proof of value. |
Justifies higher reimbursement amounts. |
Tip: Store all photos and documents in a cloud folder labeled “Flood Claim YYYY” for quick access.
❌ Mistake #5: Keeping Contaminated Items Indoors
Leaving waterlogged and contaminated furniture, rugs, or debris inside can raise humidity, spread mold spores, and make the cleanup zone hazardous to your health.
| Do This Instead |
Healthier Outcome |
| Move damaged items outside as soon as safely possible. |
Reduces moisture and mold growth indoors. |
| Separate salvageable items from debris piles. |
Prevents cross-contamination and preserves what can be saved. |
| Wear PPE when handling soaked materials. |
Protects skin and lungs from contaminants. |
Tip: Photograph and label debris piles by category for easier insurance processing.
❌ Mistake #6: Overlooking Hidden Moisture
Water can hide in wall cavities, under floors, and inside insulation long after surfaces look dry. Ignoring these pockets leads to lingering mold and structural issues.
| Do This Instead |
Long-Term Benefit |
| Use moisture meters or infrared cameras to check hidden areas. |
Detects dampness before it causes bigger problems. |
| Pull baseboards and drill weep holes if needed. |
Allows trapped water to drain and air to circulate. |
| Document all hidden moisture findings for insurance. |
Strengthens claims and covers repair costs. |
Tip: Recheck hidden areas a week later—moisture can migrate into new spots.
❌ Mistake #7: Mixing Salvageable and Unsalvageable Items
Tossing everything into the same pile—whether it can be saved or not—can lead to cross-contamination, mold spread, and insurance headaches when adjusters inspect the damage.
| Do This Instead |
Why It Helps |
| Create separate zones for salvageable, questionable, and unsalvageable items. |
Keeps clean items from getting contaminated. |
| Use tarps or pallets to elevate salvageable goods. |
Prevents moisture absorption from the ground. |
| Document each group with photos for insurance. |
Provides clarity and speeds claim processing. |
Tip: Use bright-colored tape to clearly mark salvage zones.
html
Copy
Edit
❌ Mistake #8: Using Household Vacuums for Water Removal
A standard household vacuum isn’t built for flood cleanup. Using one on water can cause electrical shock, ruin the motor, and even start a fire.
| Do This Instead |
Better Approach |
| Use a wet/dry shop vac designed for water removal. |
Built to safely handle liquids without damage. |
| Rent or hire professionals with submersible pumps. |
Removes large volumes quickly and safely. |
| Always wear rubber boots and gloves when operating equipment near water. |
Prevents electric shock and contamination exposure. |
Tip: Check local tool rental centers for industrial water extractors—they can save hours of work.
❌ Mistake #9: Forgetting to Check for Structural Damage
Rushing into a flood-damaged building without assessing structural integrity can put you in danger from weakened floors, sagging ceilings, or compromised walls.
| Do This Instead |
Safety-First Outcome |
| Inspect from the outside for leaning walls or sagging roofs. |
Identifies hazards before entering the property. |
| Check floors for soft spots or bowing before walking in. |
Prevents falls through weakened surfaces. |
| Bring a flashlight to spot hidden cracks or water lines. |
Helps find early signs of collapse risk. |
Tip: If anything looks unstable, get a structural engineer before entering.
❌ Mistake #10: Skipping the Final Sanitation Step
Even after drying and removing debris, harmful bacteria and mold spores can linger. Skipping a final disinfection can leave invisible hazards behind.
| Do This Instead |
Cleaner, Safer Result |
| Use an EPA-registered disinfectant on all affected surfaces. |
Kills bacteria, viruses, and mold spores left behind. |
| Follow dwell time instructions for maximum effectiveness. |
Ensures the chemical actually sanitizes surfaces. |
| Ventilate after application to remove chemical fumes. |
Improves air quality for re-occupancy. |
Tip: Sanitize tools, gloves, and footwear before using them elsewhere to avoid spreading contamination.
We’ve spent enough time knee-deep in post-flood chaos to know that the cleanup is as much about strategy as it is about elbow grease. We’ve made some of these mistakes ourselves and learned the hard way, which is why we’re sharing them now, so you don’t have to. We’ve seen firsthand how a little planning, the right gear, and a smart approach can turn a dangerous, exhausting job into a safer, faster, and more effective recovery. If we can help you save even one room, one appliance, or one day of hard labor, then we’ve done our job.